18 December 2006

Vista Image XMP Tags

Microsoft Windows Vista lets you set various meta-data properties for image files, ie JPEG and TIFF files. A new feature is to add one or more Tags to a picture.

Previously, meta-data information was added to image files using EXIF (Exchangeable Image File Format). However Vista adds image meta-data using XMP (Extensible Metadata Platform) - this is XML-formatted information embedded in the image file. Click here to get the XMP spec. Where possible the meta-data is also stored in the corresponding EXIF data.

Using the ASP.NET System.Drawing.Image class, it did not seem to be possible to extract the XMP data in a JPEG file. The XMP is stored in an APP1 section. To find it, I therefore did a somewhat nasty binary scan for these 29 characters http://ns.adobe.com/xap/1.0/ and then checked for the APP1 marker 0xFFE1 two words before. The first word beforehand then contains APP1 size. The XMP Packet byte[] can then be extracted and decoded from UTF-8.

For TIFF files, System.Drawing.Image returns the XMP byte[] data as property id 700.

For both file types, the XMP Packet can then be loaded using System.Xml.XmlDocument. The actual XML lets you extract data from these fields (the Vista usage is in brackets):

  • dc:subject (Tags)

  • dc:title (Title)

  • dc:creator (Author)

  • dc:description (Subject)

  • dc:rights (Copyright)

  • tiff:artist (Author)

  • exif:UserComment (Comments)

  • xmp:Rating (Star rating number)

  • MicrosoftPhoto:LastKeywordXMP (seems to the same as dc:subject)

  • MicrosoftPhoto:Rating (not sure what this is)


The actual field values are in plain text, rdf:Bag, rdf:Alt or rdf:Seq lists.

I did this work to add the meta-data information to that found by my ASP.NET search engine FindinSite-MS.

11 December 2006

Microsoft Windows Vista Multi-boot

I got a new hard disk to work with Vista (as well as to cope with bulging photo files etc). I currently use HyperOS to multiboot between various Windows systems - one on each partition - although I virtually never boot into systems prior to XP nowadays.

I installed the new Barracuda drive as the second drive on the system and partitioned it into 5 chunks using Seagate's DiscWizard, ie one primary partition and 4 logical partitions (in an extended partition).

After a bit of heartache I am now in the position where the Vista bootloader presents these three options at startup:
* Earlier version of Windows
* Microsoft Windows Vista
* 95 98 ME Systems
The "Earlier version of Windows" option boots into the current HyperOS-selected version of Windows.

The main point to notice is that when in XP I have various drives on Disk 1 labelled C: to M: with Disk 2 showing up as N: to R: and DVD drives as S: and T:.
However when in Vista, Disk 2 shows up as C: to G:, the DVDs as H: and I: and Disk 1 as J: onwards. This scenario might require careful handling if you have shared data or batch files etc.

To get to this happy situation required some work. An initial new install of Vista from one of the XP instances led to a hung boot. After getting over the initial panic, changing the BIOS boot order to boot on an XP boot CD let me go into a Recovery Console. The fixmbr and fixboot commands restored the old status quo.

(Each disk has a Master Boot Record (MBR) with load code and basic partition information. In addition, each partition has a volume boot record that contains the real OS loader. The fixmbr and fixboot commands restore the XP loader (NTLDR) for these boot records. The HyperOS cobblerx command also restores the XP MBR.)

The Vista boot loader (BCD) has a new MBR and volume loader (WINLOAD). The load information is stored in the C:\BOOT\ directory in the BCD file.

An easy way to cope with the BCD from XP and Vista is to use NeoSmart's EasyBCD tool - it seems like you must have the .NET framework 2 installed to use EasyBCD.

Perhaps the trick to installing Vista might have been to *first* use EasyBCD to install the Vista Master Boot Loader before starting the install.

19 October 2006

Google gadget on your webpage

Google gadgets can now be placed on your own web pages, taking the wind out the sails of Widgetbox etc. Previously, Google gadgets could only be places on your personalised Google home page, a Google pages site or the Google Desktop Sidebar.

For a gadget that appears in the Google-Gadgets-for-your-Webpage directory, such as my Space Browse virtual tour viewer, click on the "Add to your webpage" button. You are then taken to a page where you can choose various display and gadget settings. It is often important to choose a suitable display width and height. For Space Browse, choose 300x260 pixels.

Then click "Get the Code" to show a textbox containing the HTML to copy and paste into your web page. For the Space Browse gadget, this looks like this, with all your settings encoded as parameters:
<script src="http://gmodules.com/ig/ifr?url=http://www.spacebrowse.com/gadget/SpaceBrowse.xml&up_SiteNo=&up_ShowMode=Random&up_UserName=&up_Search=&synd=open&w=300&h=260&title=Space+Browse+virtual+tour&border=%23ffffff%7C3px%2C1px+solid+%23999999&output=js"></script>

You then simply have to cut and paste this HTML code onto your web page. For some sites such as on a blogsite Blogger template, you will have to replace the & characters with &amp; as follows:
<script src='http://gmodules.com/ig/ifr?url=http://www.spacebrowse.com/gadget/SpaceBrowse.xml&amp;up_SiteNo=&amp;up_ShowMode=Random&amp;up_UserName=&amp;up_Search=&amp;synd=open&amp;w=300&amp;h=260&amp;title=Space+Browse+virtual+tour&amp;border=%23ffffff%7C3px%2C1px+solid+%23999999&amp;output=js'></script>
Note that Blogger amends the end of the script tag, which is OK.

You can see an example of the Space Browse Google gadget running at the bottom of this web page.

27 September 2006

Snipperoo widget

The Snipperoo widget management system is in beta. It lets you turn any code snippet into a "widget". One or more widgets are then placed on a "panel". Snipperoo then provides a JavaScript "codeline" for you to copy into your site, blog, etc.

You can see an example Snipperoo widget - my Space Browse viewer - at the bottom of this blog post, using this codeline:
<script type='text/javascript' src='http://codelines.snipperoo.com/chriscant/snipperooney/codeline.js'></script>
Note that blogger will not let you place this codeline within a blog post - it has to be in the template. I have code the template so that the Snipperoo widget only shows when the specific blog post is shown, as follows:
<b:if cond='data:blog.url == "http://chriscant.phdcc.com/2006/09/snipperoo-widget.html"'>
</b:if>


To make a Snipperoo widget, register for their beta program. Make a new panel with dimensions 300x280. Make a new module. To make a Space Browse viewer widget, use this widget code:
<iframe src="http://www.spacebrowse.com/gadget/SpaceBrowseViewer.aspx?Caller=SN" frameborder="0" scrolling="no" style="border:0px;padding:0px;margin:0px;width:100%;height:240px;"> </iframe>
Click on the (+) icon to add it to your panel. Click on "show codeline" to get the JavaScript code to paste into your site.

The above widget code can be customised as described in the Space Browse viewer mashup guide.

25 September 2006

Netvibes IFRAME mini module

This post describes how to put together a Netvibes.com Mini Module that shows an existing web page within an IFRAME. My Space Browse viewer example is listed in the Netvibes ecosystem gallery. You can also install it by clicking here: Add to Netvibes  (Note that this image link uses addApiModule.php not subscribe.php.)

You can see the complete code for this module if you go here and then view source. Simply viewing the page shows the Edit options.

A Netvibes Mini Module is a public web page. My technique is to keep the module web page separate from the web page that does the main work. This lets me have one viewer page that I can share across various mashup scenarios such as gadgets, widgets or plain IFRAMEs.

It is assumed that you have a web page available that is designed to display output in a small space. This might be existing gadget/widget code or perhaps PDA output.

The core of an IFRAME module is this JavaScript onload handler in the header which creates an IFRAME and adds it to the module:
<script type="text/javascript">
var url = "http://www.spacebrowse.com/gadget/SpaceBrowseViewer.aspx?Caller=NV";
NV_ONLOAD = function()
{
  var m_iframe = document.createElement("iframe");
  m_iframe.scrolling = "no";
  m_iframe.frameBorder = "0";
  m_iframe.src = url;
  m_iframe.width="100%";
  m_iframe.height="240px";
  m_iframe.border="0px";
  m_iframe.padding="0px";
  m_iframe.margin="0px";
  m_iframe.overflow="hidden";
  NV_CONTENT.appendChild(m_iframe);
}
</script>

An IFRAME is a rectangular window on a web page that displays the contents of another URL. The web page at this other URL only sees the (small) rectangular window it is given, and cannot interact with anything else on the page including your module code.

Note that the IFRAME is given a fixed height but 100% width. Your web page can find the actual width that you have available in document.body.scrollWidth.

If your page is configurable then add a form with class "configuration" to the body of your module, eg to add a search parameter:
<form class="configuration" method="post" action="">
  <label>Search:</label>
  <input name="Search" type="text" value="" />
</form>


The user's preferences are available using the Netvibes getValue() JavaScript function. You can then add any received value to your IFRAME URL as follows:
  var SearchWord = getValue("Search");
  if( SearchWord && SearchWord!="undefined")
    url += "&Search="+SearchWord;

You could also add a "Height" parameter and use it to change the IFRAME height.

Your module page should also include a definition of an icon to display in the module header, eg as follows:
<link rel="icon" type="image/png" href="http://www.spacebrowse.com/gadget/SpaceBrowseNetvibesIcon.png" />
The icon should be 16x16. The icon can be truncated in height so concentrate the image towards the top.

If you submit your module to the Netvibes then it is a good idea to have a screenshot available. I think that this is shown reduced to 160x120, with a link to a full size image.

21 September 2006

CSS liquid captioned image list

Despite being an aged programmer (I used punched cards while at school!), I find it difficult to get to grips with XHTML page layout using CSS. I find it very hard to get the effect that I want to achieve. It was generally a lot easier when using tables. Perhaps we need a new tag or attribute that works like a table but is ignored by accessibility browsers.

Anyway, I like (a) liquid flows and (b) specifying fonts without using fixed point sizes.

My latest task was to show a lot images. I wanted them to fill all the available screen space, so a liquid layout was called for. If I simply used a series of IMG tags then this would work immediately. However I also wanted to show a caption underneath (and make the image a link).

My own attempts to make this work failed. I nearly resorted to using a non-liquid table layout. Eventually a search found Mark Newhouse's guide (which is one of those annoying sites which come up with a smaller font than normal). The basic idea is to have each photo/caption block in a DIV that floats to the left. If you add lots of these then each DIV goes to the right of the previous one if there is room, and onto the next line if not. You need to round it off with a DIV style clear:both. Thanks Mark.

My eventual solution can be seen here. Even this solution has its problems, stemming from the fact that the caption text is of variable length. If I set a fixed style height then FF and O would truncate the text, even with overflow:visible set. So I guessed a suitable min-height. The problem remains that picture/caption blocks have different heights. So when a block floats down, it may display at the block that sticks down the most - which is not necessarily at the start of the line. You can see this after a row or three using the above link.

There are also printing problems. IE only shows one page of floating DIVs before giving up. FF does display all the DIVs but those at the bottom of the page are often not shown in their entirety.

Any better suggestions appreciated.

15 September 2006

Find-in-Files for ascx.cs in Visual Studio

Just a quick warning to say that Visual Studio 2005 (and probably 2003) Find-in-Files will not by default find text in *.aspx.cs files if you use the standard file types spec: *cs;*.vb;*.resx;*.xsd;*.wsdl;*.htm;*.html;*.aspx;*.ascx;
*.asmx;*.asax;*.config;*.asp;*.asa;*.css;*.xml
even though *cs is in the spec.

I reported this here in Microsoft Connect Feedback but Microsoft insist that it is by design. Weird!

Anyway, make sure that you add *.aspx.cs and other variants (eg *.asmx.cs) to your file spec, separated by semi-colons. I also add *.js;*.master

Actually, I've just noticed that the standard file spec has *cs. If you change this to *.cs with a period then it also works.

12 September 2006

Tag aware widget

This posts shows an example of a widgetbox tag aware widget - using my Space Browse virtual tour widget.

This blog entry contains a standard widgetbox DIV to place the widget and an extra A tag to define the tag. The tag is "hoff" which tells Space Browse to search for a virtual tour that contains the word "hoff". Here's the HTML:
<div class="wbx-widget" id="f3a39c0a-cbf9-4c51-92fa-d1cf6abfe54f"></div>
<a rel="wbx-keywords" title="hoff"></a>


You should always see the virtual tour called "Rock climbing at The Hoff" here.


Here's the widgetbox docs for tags:

08 September 2006

Tabindex order accessibility issues

I released a new version of the Space Browse viewer yesterday. This was a major update because it made the viewer more accessible to keyboard users. However there are some unresolved issues... so any help appreciated.

The viewer has various tool button images used for navigation etc, as can be seen on the right in the "Space Browse widget". The previous viewer version used DIV HTML elements with onclick handlers added. The new version uses INPUT TYPE="image" elements (with onclick handlers) that let users use the tab key to move between focus elements on the page, thereby hopefully improving accessibility.

The new viewer INPUT elements all have TABINDEX attributes to set the order of the controls. For the viewer I started the TABINDEX values at 200. This helps the overall page layout:
  • Master page header: tabindex values start at 1
  • Page before viewer: tabindex values start at 100
  • Viewer: tabindex values start at 200
  • Page after header: tabindex values start at 300
  • Master page footer: tabindex values start at 400


I had to be careful with the INPUT image element borders. Originally I had border:1px solid gray;. However this did not work well in IE because it shows the element with the focus by giving it a gray dashed 1px border - this did not show up. So I used other colours.

Issue 1: tab order of elements added in JavaScript
My new viewer code adds some INPUT elements in JavaScript after the static elements have loaded. These added INPUT elements do have TABINDEX values in the correct order. However browsers do not respect these values - instead the elements are treated as if they had no TABINDEX, ie the user tabs to them after all the items that do have a TABINDEX. Tested in IE6, FF1.5 and O9 in Windows XP.

Issue 2: IE added elements invocation
Once you have tabbed to aan element in Internet Explorer you can press either Space or Enter to "click" it. When I added INPUT elements in JavaScript I saw a weird bug. If you use Space then the correct element is "clicked". However, if you use Enter then the wrong element is "clicked", ie the first added element is always "clicked". Tested in IE6 in Windows XP.

This is the code that I use:
fInput["onclick"] = function() { return space_gotoFrame(this.alt,true,null); }
where fInput is the INPUT element. When clicked, this.alt should be the filename of the photo to go to.

Issue 3: Opera tabbing
If appropriate, the viewer removes various INPUT elements by setting display:none;. In Opera 9 in Windows XP this caused problems with the tab order: Opera does not skip such elements, instead it goes back to the start of the page and so does not let you tab to all page elements.

Regards other browsers: FireFox was best at tabbing because the focus element stayed the same after a "click" even if the element was disabled. Interner Explorer always loses the focus element if it is disabled.

Later: ASP.NET asp:TreeView TabIndex
The ASP.NET asp:TreeView server control has a TabIndex property. However it does not implement it very well. The TreeView is implemented as a DIV with tables inside. The DIV is given the specified TabIndex; however the links inside are not, so those links appear at the wrong place in the tab order

07 September 2006

Space Browse viewer Google gadget

The Space Browse virtual tour viewer Google gadget is now listed in the Google content directory. Click on the "Add it now" button to add it to your personalised home page. As yet, I haven't been able to find out which directory category it has been put in.

I spotted the directory entry after I'd signed up for a Google Pages account. The Space Browse gadget works fine there, as can be seen here: jchriscant.googlepages.com. To add to your Pages site you must have the Experimental features enabled. Then edit a page, click in an editable field then press "More". With "Standard gadgets" selected, search for "space browse". Click on "Space Browse virtual tour", then "Add Gadget >>" and agree "OK".

I have improved the Space Browse gadget since my previous post. It now fits into the given space better and has various parameters. I noticed that you can resize the rectangle for the gadget in Google Pages, so I will have to add in parameters to let you set the display size.

As an aside, I have been working on version 2 of the viewer/gadget/widget. This uses proper HTML INPUT fields to show the navigation controls. This makes the viewer more accessible to keyboard users. When this is done I will be able to submit it to the Windows Live gallery.

25 August 2006

Another day, another gadget

It seems like there are quite a few sorts of mash up gadgets and widgets to be had: Microsoft gadgets, Yahoo widgets and Apple dashboard widgets to name but a few.

Today I put together a Space Browser virtual tour viewer Microsoft Gadget, based on the LazyGadget example. So far it doesn't have any parameters and has not been added to the Microsoft Live Gallery yet. [Later: here it is in the gallery - go to this page to "Add to Live.com" or "Add to your space".


Or you can add it your Windows Live site at www.live.com by clicking on Add Stuff then Advanced Options. After "Add a Gadget by URL", enter the gadget manifest XML URL:
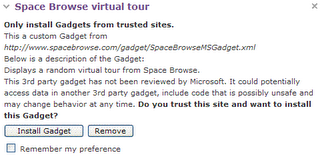
http://www.spacebrowse.com/gadget/gadget.xml and click on "Subscribe". The site then prompts "Only install Gadgets from trusted sites". Click on "Install Gadget" after selecting "Remember my preference".
Only install Gadgets from trusted sites
That should be it. You should be able to move or collapse the gadget as normal. If you close your browser while the gadget is collapsed then it will not display correctly when expanded unless you refresh the page.

You can also add the gadget to your Windows Live Spaces site - click on "Add to your space" in the Gallery listing
Currently the gadget will only be visible to you when logged in; visitors will not see it. To add the gadget, click on this link: http://spaces.live.com/spacesapi.aspx?wx_action=create&wx_url=http://www.spacebrowse.com/gadget/gadget.xml. Again, you will have to confirm the installation.

When the gadget is listed in the Windows Live Gallery you will be able to add it and make it visible to all viewers.

It is present on my Live Space at chriscant.spaces.live.com but you will not be able to see it as a visitor.

23 August 2006

My gadget's now also a widget

I've improved my Space Browse Google gadget since the previous post so that it fills the screen area better and has optional parameters to choose random or recent tours and tours just by a specified username.  Having provided a pithy author_aboutme and author_quote etc, I will submit it for listing in the Google content directory.  My gadget also seems to work OK on the Google Desktop Sidebar.

I had previously signed up to Widgetbox.  Last night I was able to add my gadget as a widget very easily - it worked first time, hurray!  Here it is: Widgetbox Space Browse widget.  Today I updated it to have parameters.  Where the gadget parameter was ShowMode, I specified a widget parameter called up_ShowMode, etc.

Widgetbox lets you add a widget directly onto any web page, eg onto a blogger template as can be seen below - optionally, in an widgetbox panel.  In Firefox, the widget overlaps the dotted vertical divider, which doesn't happen in Internet Explorer 6.  To add a widget to a blogger blog post you have to add a widgetbox panel (empty if you want) in the template and then use a specified DIV within the post itself:

21 August 2006

Internet Explorer 7: Locally run Java applet getAppletContext().showDocument(url) doesn't work - drive repeated

This issue has been fixed in Internet Explorer 7 RC1. Great!
[I can only assume that Microsoft did not acknowledge the problem in my bug report because they were testing with the fixed version rather than the beta 3 version.]


Just before last week's break, I posted feedback about Internet Explorer 7 beta 3.

A customer of our FindinSite-CD software had reported that a user of theirs had tried our software in IE7. It ran into a problem when run locally, ie from CD.

The problem is that a Local Machine Java applet call to getAppletContext().showDocument(url) does not work for a relative URL because the drive portion of the file URL is repeated. Instead, an error such as this is shown in a message box: Cannot find file 'file:///C:/C:/PHD/IE7test/iamshown.htm'

Here's my feedback report to Microsoft - you will need to register to see it. It seems as though Microsoft were unable to reproduce the problem and so closed the issue. If you can repeat it, please Validate and Vote for it once you have confirmed that my posted example fails as described.

Assuming that this is a real problem, then it will make our software not work in IE7 which is a crucial browser for us.


PS Just saw an article in Ethical Consumer which could be summarised as "New organic range of underwear approved by Soil Association".

10 August 2006

Made a first Google Gadget for Space Browse

Just a brief note to say that I managed to make a Google gadget very quickly for my Space Browse virtual tour site. Having read quickly through the Google Gadget starter documentation earlier in the day, it only took an hour or so to make a gadget that shows a random virtual tour.

I had to make a new web form page that used a new stored procedure to get a random publicly accessible photo-site. Thanks to whoever it was who had the tip that adding ORDER BY NEWID() gives a random result set for a SELECT statement. This works by generating a new uniqueidentifier/guid for each result row; because the Guids are random, ordering on this will return a randomly sorted result set. I added TOP 1 because I only wanted one random result.

The gadget found a bug in my existing code that assumed that something divided by something else was an integer. I fixed it by using Math.floor().

The gadget is still basic because it does not respond to the provided width. It also needs to remove some of its borders.

Anyway, here's the gadget:
http://www.spacebrowse.com/gadget/SpaceBrowse.xml
Add to Google

09 August 2006

asp:HyperLink includes an extra space in the link

Only a minor point, but poor form...
If you have an asp:HyperLink in an ASP.NET2 app then it is sometimes rendered with an extra space within the link which gives an underlined space at the end of the link.

Suppose you have the following:
<asp:HyperLink ID="idLink" runat="server" Text="Hello" />

When rendered incorrectly, there are line breaks between these three lines which causes the problem:
<a id="ctl00_MasterLoginView1_something" href="something.aspx">
Hello
</a>


When rendered correctly, there are no line breaks.

I haven't been able to determine exact circumstances when rendering is incorrect.

Coping with links in cookieless mode in ASP.NET2

A new web site project that I am working on might be used a lot from internet cafes and the like where it is possible that cookies are disabled. I therefore started to look at how to support cookieless mode in an existing alpha web site of mine www.spacebrowse.com - go there to try it out with cookies disabled once you have registered for free.

The ASP.NET2 site uses Forms authentication, specified in Web.Config as follows:
<authentication mode="Forms">
   <forms protection="All">
</authentication>


cookieless - UseDeviceProfile

The forms element "cookieless" attribute has a default value of "UseDeviceProfile". Basically this doesn't work if a browser has cookies turned off. "UseDeviceProfile" looks at the type of viewer, so it will assume that cookies are turned on for IE/FF/etc, but will assume they are not for some other device types.

cookieless - UseUri

Another option for "cookieless" is "UseUri" which means that cookies are not used. Instead, ASP.NET2 mangles the URL to include the information that would have been stored in the cookie. A http: URL such as this:
http://localhost/SpaceBrowse/Default.aspx
is mangled to look like this:
http://localhost/SpaceBrowse/(F(ekocDSRz...PZKv3ah41))/Default.aspx
where a lot of characters have been removed at the ellipses.

If you look carefully, you will see that the mangled URL contains an extra folder name. When I saw this, I thought that all resources and relative links from this page would go wrong. In fact, they don't because the ASP.NET ISAPI DLL filter intercepts all requests and resolves them correctly if it detects mangled URLs. Also note that Request.Path as seen by the ASPX page is correctly SpaceBrowse/Default.aspx, ie without any mangling.

cookieless mangled URL links

However there is an issue as regards links. If you want the user to stay logged in, then the URL they browse to has to have a mangled URL. This means that you must use relative links to stay logged in. Any absolute links will not include the mangled URL. You will be OK if you use <asp:hyperlink> and the like with NavigateUrl="~/sites.aspx" or whatever because ASP.NET resolves the ~/ correctly.

My MasterPage template is used by pages in various directories. My original code included static absolute HTML links to pages on the site. These links did not include the mangled URL and so the user's login status is forgotten. The solution is to use ASP.NET controls for all such links (even though that might require a small amount more server-side processing).

Aside 1: When testing "UseUri" mode in IE using ASP.NET Development Server, if you have links to directories then they will not work if they end in "/". You must change them to "/Default.aspx" to be able to see the requested page in cookieless mode. When working through IIS, ordinary directory requests will work OK.

Actually, it is important that all your links to directories end in / - otherwise the mangled URL will be lost.

Aside 2: When you log off in mangled URL mode (using asp:LoginStatus LogoutPageUrl="~/default.aspx"), the URL you get redirected looks like this:
http://localhost/SpaceBrowse/(X(1))/default.aspx
Although strange, everything works OK.

cookieless - AutoDetect

Anyway, back at my original problem: how to cope if a browser has cookies turned off. The best option is to set "cookieless" to "AutoDetect" in the Forms element. With this setting, ASP.NET probes to see if cookies are set; if cookies are enabled, then they are used; if not, then mangled URLs are used.

The probing mechanism seems to kick in when you click a Login button. To determine if a browser session has cookies enabled, this parameter is added to the login URL: AspxAutoDetectCookieSupport=1.

PS. I found it easiest to test in FF rather than IE because FF has a simple method of turning off cookies; IE does it on a zone basis which I could quickly not get to work for the dev server URL http://localhost:1234/whatever/

PPS. Found that cookies must be enabled for yahoo/flickr to let you log on.